This project is based on the Original Self Build Eaglemoss V3 3D Printer but was developed for more precise and controllable quality printing.
Using a RAMPS 1.4 EFB Controller mounted on an Arduino Mega 2560 microcontroller runing Marlin firmware the Octoprint Web-based software runs the printing. This screen shot below is the Octoprint interface.

You will also need Putty and VSCode to configure and compile the firmware
This section shows the development of the 3D Printer (shown below)
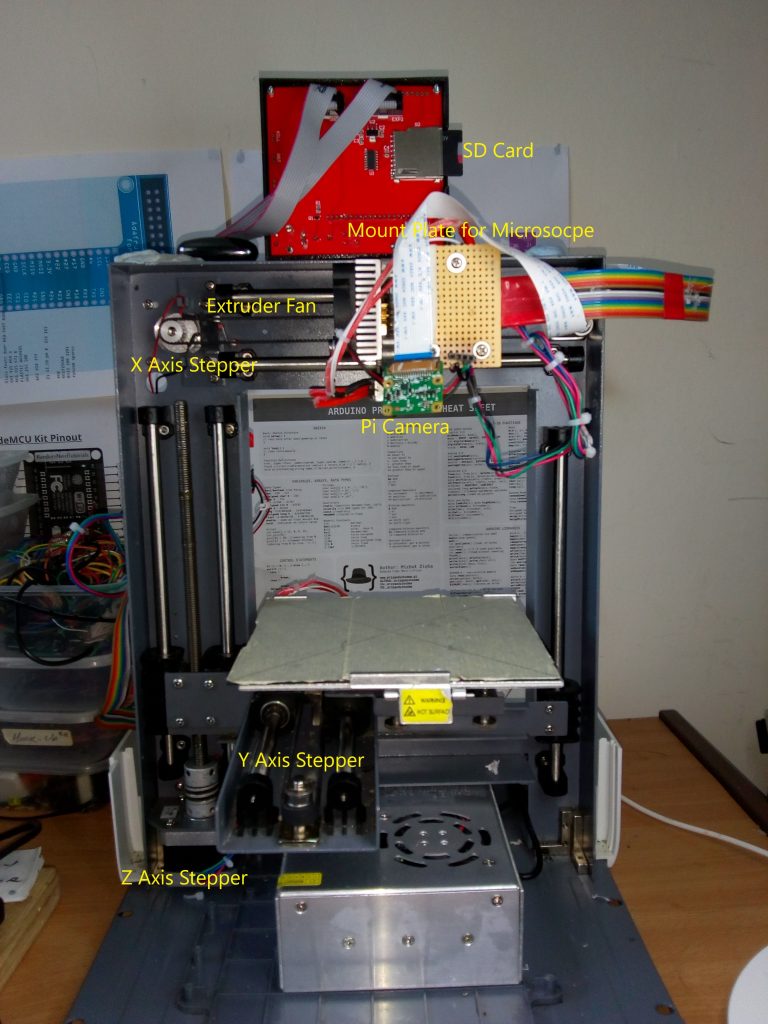
Rear View
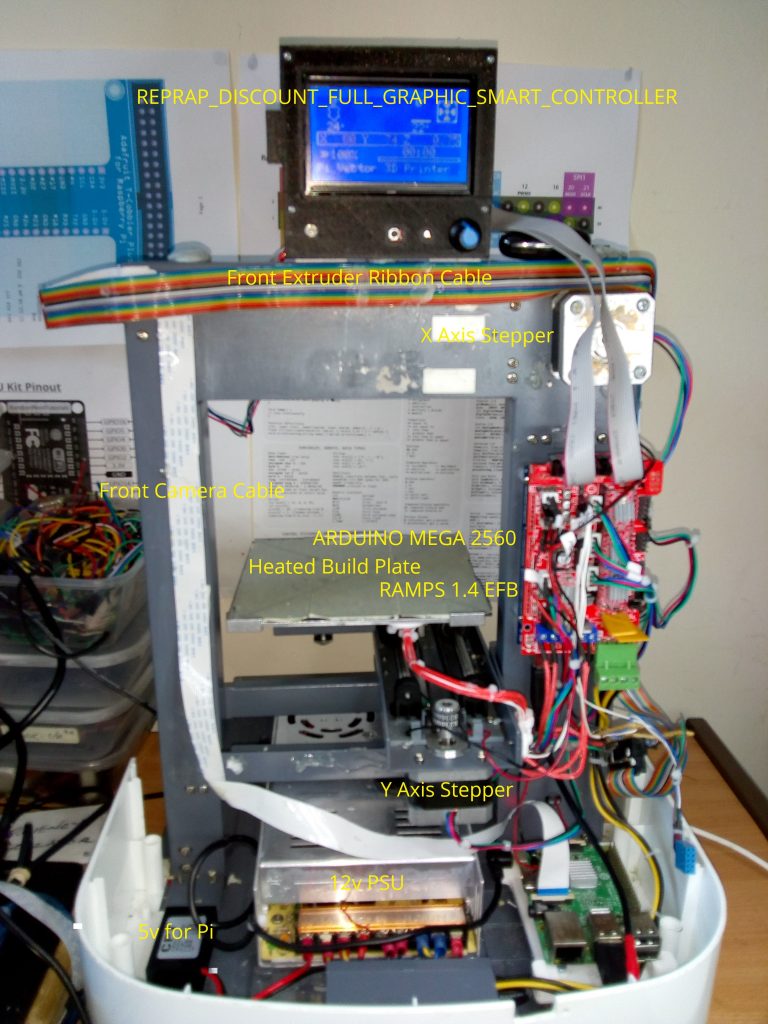
Front View
Flashing the Pi with the OctoPi Firmware Updater Plugin
Firstly enter the Configuration details on this Screen (accessed from the ‘tool icon’ shown to right in the screen below

AUTOUILD

In VSCode “Autobuild” will create a file Firmware.elf.
The .hex file version of this file can then be flashed to the Pi using the this dialog box of the “Firmware Updater Pluign”

Save this dialog box and locate the .hex file using the BROWSE button. It is, by default, found here \Marlin\Marlin-bugfix-2.0.x.pio\build\mega2560 (my installation directory)
Here is a timelapse video capured with the Pi Camera and Octoprint’s Timelapse module. It is not using filament and is run usingthe “Dry Run Plugin”
To run this project on my devlopment environment you will need a hanful of usernames and passwords. These can be provided by my executors.